Attic Insulation: A Guide to DIY Spray Foam Application
When was the last time you thought about your attic? It might be the most overlooked space in your home. Still, it is crucial to keep your house comfortable and energy efficient. Without proper insulation, your attic could be silently driving up your energy bills and contributing to uncomfortable indoor temperatures. That's why insulating your attic is one of your smartest home improvement decisions.
Why Attic Insulation is Essential
Think of your attic insulation as a thermal blanket that keeps the elements outside where they belong. During the cold winter months, it traps heat inside your home, reducing the need for your furnace to run frequently. In the summer, it serves as a barrier, blocking heat from the sun and helping to keep your home cool without overworking your air conditioner. By sealing your attic, you can save 15% to 30% on heating and cooling costs, which can add up quickly.

Common Problems with Under-Insulated Attics
If your attic is under-insulated, your home is likely paying the price in more ways than one:
- Sky-High Energy Bills: Poor insulation means your heating and cooling systems work harder than they should, leading to higher energy consumption and staggering utility bills.
- Inconsistent Indoor Temperatures: Without proper insulation, rooms near or below the attic may feel colder in winter and hotter in summer, making your home uncomfortable.
- Moisture Issues: When warm air escapes through the attic, it can bring moisture along with it, causing condensation, mould growth, and potential damage to your home's structure.
- Ice Dams: In regions with harsh winters, escaping warm air can melt snow on your roof, which then refreezes at the edges, causing ice dams. These can damage shingles, gutters, and even your roof's structural integrity.
How Spray Foam Insulation Addresses These Needs
Here's where spray foam insulation steps in as a game changer. Unlike traditional insulation materials like fibreglass or cellulose, spray foam expands to fill every nook and cranny, ensuring that your attic is fully sealed off from the outside world: no more drafts, no more leaks—just a comfortable, energy-efficient home.
As Natural Resources Canada points out, air sealing is a critical component of insulation, and spray foam does this better than any other material. Its benefits include:
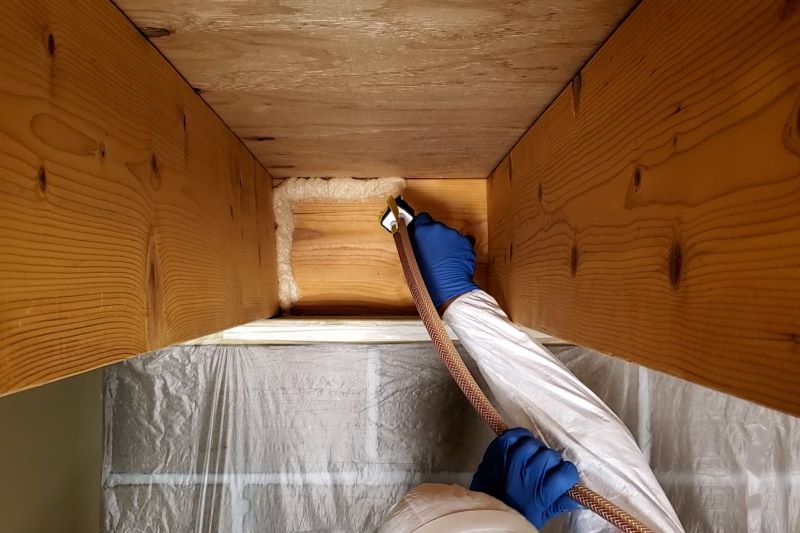
- Sealing Air Leaks: Spray foam provides an airtight seal around vents, chimneys, and other penetrations, which stops warm air from escaping in winter and keeps cool air inside during summer.
- Moisture Barrier: By filling every gap, spray foam prevents moisture from sneaking in, protecting your attic and home from mould and rot.
- Maintaining Consistent Temperatures: Spray foam's high R-value means better insulation and more stable indoor temperatures, making your home feel more comfortable year-round.
R-value measures how well a material resists heat flow. A higher R-value indicates better insulation, keeping heat in during winter and out during summer. It reflects how effective insulation maintains comfortable indoor temperatures and improves energy efficiency.
So, if you want to make your home more energy-efficient and comfortable, spray foam insulation might be the upgrade your attic (and your wallet) needs.
Preparing Your Attic for Spray Foam Insulation
Before diving into the world of spray foam insulation, it's essential to prepare your attic properly. A little groundwork can make a big difference in the effectiveness of your insulation project. Here's how to get started!
Assessing Attic Space & Condition
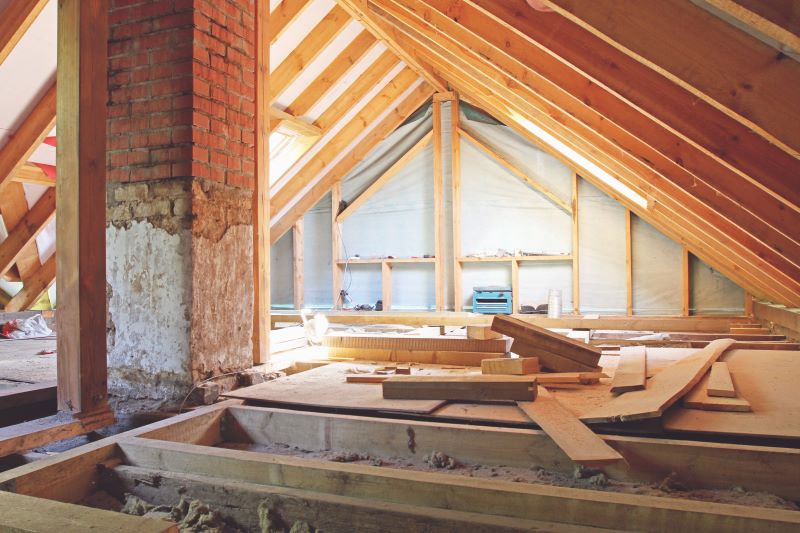
To start, you'll need to access your attic. Most attics can be reached through a hatch or pull-down stairs in a hallway or closet. If your attic has a fixed staircase, ensure it is sturdy and well-lit. If you are using a pull-down ladder, check that it is in good working condition before climbing up. Once inside, consider using a flashlight or headlamp to light up the space, as attics are often dark and cramped.
Once inside, assess how easy it is to move around. If your attic has a significant amount of insulation, you may need to clear some space to navigate safely. Ensure you have enough room to work without stepping on joists or unsupported areas. If the space feels cramped or unstable, it's wise to have someone assist you or consider hiring a professional.

Image from Natural Resources Canada
Checking for Damage
Take a close look at the condition of your attic. Look for:
- Signs of Water Damage: Check for any stains or damp spots on the walls or ceiling. If you find any, investigate the source, as water issues must be addressed before insulation can be applied.
- Mould and Mildew: If you see any signs of mould growth, it's important to remove them before proceeding with insulation, as it can cause health issues and reduce the effectiveness of your insulation.
- Pests: Look for signs of pest infestations, such as droppings or nesting materials. If you find any, contact a pest control professional before adding insulation.
Current Insulation Condition
Assess the type and condition of existing insulation. If your attic is already insulated with fibreglass batts or blown-in cellulose, check for any signs of compression, moisture, or pest damage. If the insulation is in good shape, you only need to add spray foam around gaps and leaks. However, removing the old insulation may be necessary before applying the new spray foam if it's damaged or ineffective.

Seal Up Existing Gaps
Before moving on to spray foam installation, make sure to seal any visible gaps or leaks in the attic. Check around pipes, vents, and electrical fixtures, as these are common areas for air leaks. DAP offers a range of weatherproof sealants that are perfect for this job, and we recommend using HVAC Professional 100% RTV Silicone. Addressing these issues will help ensure that your new insulation performs optimally.
Safety Comes First
Safety should always come first! Before starting your insulation project, make sure to take the following precautions:
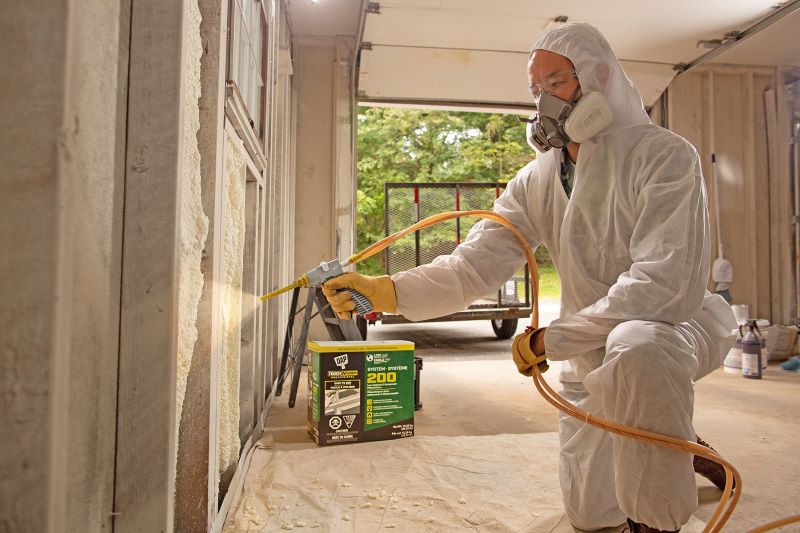
- Protective Gear: Wear gloves, goggles, and a mask to shield yourself from dust and particles.
- Ventilation: Ensure proper ventilation in your attic while working. This helps to minimize exposure to fumes from the spray foam.
- Clear the Area: Remove any items in the attic to create a safe working space; this will also help you see any areas that need repair.
Taking these steps will not only keep you safe but also help ensure a successful insulation installation.
Professional vs. DIY Installation
Now that you've prepped your attic, it's time to figure out if you want to tackle the project yourself or bring in a pro. If you're handy and up for a home improvement challenge, you might want to give it a shot yourself, especially since DAP's one-component canister foam is super easy to work with.
However, if you're dealing with a larger attic or want to ensure top-notch results, hiring a professional may be the best option. Professionals have the expertise and equipment to ensure that your insulation is applied effectively and safely, maximizing its performance.

Applying Spray Foam in Your Attic
Once your attic is prepped and ready, it's time to dive into applying spray foam insulation. This section will guide you through the necessary tools and materials, provide a step-by-step installation process, and highlight common mistakes to avoid.
Tools & Materials
- TOUCH ‘N FOAM Professional One-Component Canister Foam: for small attics or touch ups
- TOUCH ‘N FOAM Professional Two-Component Foam Kit: 200 for ~18 square meters or 600 for ~56 square meters (for skilled DIYers)
- Sealant & Caulking Gun
- Utility Knife
- Flashlight or Headlamp
- Drop Cloths: Protect your attic floor and stored items from overspray.
- Rags: For cleaning any spills or excess foam before it cures.
- Gloves: Shields hands from direct contact with foam chemicals
- Safety Glasses: Protects eyes from potential splashes or foam particles
- Respirator or Facemask: Prevents inhalation of fumes during application
Image – Canister Foam
Step-by-Step Application of Spray Foam in Attics
Remember to read the instructions thoroughly as you prepare to use TOUCH ‘N FOAM One-Component Canister Foam. This product is flammable while being applied, so taking safety seriously is crucial. Equip yourself with the appropriate protective gear and follow all precautions to ensure a safe application.
- Check and Prepare the Canister: Begin by checking the expiration date on the carton to ensure the product is still valid. Before dispensing, make sure the chemical contents are between 21°C and 32°C (70°F to 90°F). Avoid exposing the canister to heat, sparks, or open flames. Remove the cylinder from the carton, shake it about 10 times, and stand it upright, keeping the applicator in the closed position until you're ready to use it.
- Apply the Foam: Open the cylinder valve and move the wand lever to the open position, adjusting the flow rate as needed. Before applying it in your attic, test the foam on scrap material. Start in the farthest corner of the attic and work your way back toward the access point, holding the nozzle about 10-15 cm away from the surface. Apply the foam in a steady, sweeping motion, focusing on filling gaps around pipes, electrical fixtures, and any spaces in the insulation. Fill these voids completely, but avoid overfilling, as the foam will expand significantly.
- Cure and Trim Excess Foam: Applying foam outside the recommended temperature range may affect the cure time, yield, density, and overall performance. Once the foam has cured, use a utility knife to trim away any excess foam for a tidy finish.
- Clean Up: Finally, remove any drop cloths used during the application and clean up any spills with rags before the foam hardens. Dispose of any materials in accordance with local regulations.
The TOUCH ‘N FOAM Two-Component Spray Foam Kits require additional preparation and safety precautions. For more information, please refer to the Technical Data Sheet and the Safe Use, Storage, and Handling documents. Following the instructions is essential for a successful application, which is generally similar to the process described above.

Common Mistakes to Avoid
To ensure successful spray foam application, keep these common mistakes in mind:
- Skipping Protective Gear: Always wear protective gear to shield yourself from overspray and fumes. Neglecting this can lead to irritation or injury.
- Overfilling Gaps: Remember that spray foam expands as it cures. Overfilling can create a mess and require more trimming later. It's better to apply in smaller amounts and build up as necessary.
- Ignoring Ventilation: Ensure your attic is well-ventilated while working with spray foam to minimize exposure to fumes. If necessary, take breaks to step outside for fresh air.
- Rushing the Process: Take your time during application. A careful, steady hand will result in better coverage and a more effective seal.
By following these steps and avoiding common pitfalls, you'll be well on your way to successfully insulating your attic with spray foam!
Is Spray Foam Right for You?
Long-Term Durability and Performance
One of the standout features of spray foam insulation is its long-lasting durability. When properly applied, it effectively resists moisture and prevents the growth of mould, which is a common issue with traditional insulation materials. Spray foam also adheres tightly to surfaces, providing an airtight seal that minimizes air leaks. This durability translates to better energy efficiency over time, ensuring your home remains comfortable regardless of the season.
Comparing to Other Insulation Types
Spray foam insulation, especially DAP's one-component canister foam, offers several advantages over traditional insulation materials like fibreglass batts and cellulose. While fibreglass can sag or settle over time, reducing its effectiveness, spray foam maintains its shape and insulating properties. DAP's spray foam provides superior thermal resistance with a higher R-value per inch, allowing homeowners to achieve exceptional energy efficiency with less material. For DIY enthusiasts, this means a more straightforward application process and better results than conventional options.

Making the Right Decision for Your Home
Choosing the right insulation is essential for optimal energy efficiency and comfort in your home. DAP's canister foam makes it easy for homeowners to tackle insulation projects themselves, so you can customize it to fit your needs. Whether you're trying to boost your attic's insulation or seal up annoying air leaks, keep your budget, climate, and energy savings in mind. In the end, investing a little time and effort into the right insulation can lead to a more comfortable home and lower energy bills.
Where to Find Professional Insulation Services
While many homeowners may choose to tackle insulation projects with DAP's canister foam, it's always beneficial to consult professionals if you have questions or need assistance. Look for reputable contractors who can offer insights into best practices for using spray foam insulation. Even if you opt for a DIY approach, professionals can provide valuable guidance on preparation and application techniques to ensure you achieve the best results.
Explore Financial Assistance Options
If you're thinking about improving your home's insulation, be sure to check out the financial assistance options available for Canadian homeowners. The Canada Greener Homes Initiative provides grants and loans to support energy-efficient upgrades, including insulation projects. To learn more and find out if you qualify, visit their website.

 Canada - EN
 USA - EN